


How to Master Night Photography with an SLR Digital Camera
Night photography can be a magical pursuit, capturing the beauty and mystery of scenes illuminated only by the moon, stars, or artificial lights. However, mastering night photography with an SLR digital camera comes with its own set of challenges. In this comprehensive guide, we will walk you through everything you need to know to become proficient in night photography. From choosing the right equipment to understanding camera settings and post-processing techniques, we’ve got you covered.
Why Night Photography?
Night photography offers a unique perspective that cannot be replicated during the day. The play of shadows, the glow of city lights, and the twinkling of stars create a surreal and enchanting atmosphere. According to a 2018 survey by Statista, 36% of Americans engaged in photography as a hobby, with many showing a keen interest in night photography. Capturing these breathtaking scenes can be incredibly rewarding, but it does require some specialized knowledge and tools.
Essential Equipment for Night Photography
Before you head out into the night with your SLR digital camera, make sure you have the right gear. Here are some must-have items:
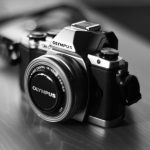
SLR Digital Camera
While you can technically use any camera for night photography, an SLR digital camera offers greater flexibility and control over settings. Look for a camera that performs well in low-light conditions and has a wide ISO range.
Lens
A fast lens with a wide aperture (e.g., f/2.8 or lower) is ideal for night photography. Popular choices include prime lenses like the 50mm f/1.8 or wide-angle lenses like the 14-24mm f/2.8.
Tripod
A sturdy tripod is essential for night photography to avoid camera shake during long exposures. Make sure your tripod is stable and can hold the weight of your camera and lens.
Remote Shutter Release
Using a remote shutter release helps minimize camera shake when pressing the shutter button. This is especially useful for long-exposure shots.
Extra Batteries and Memory Cards
Long exposures can drain your battery quickly, so always carry extra batteries. Similarly, bring additional memory cards to ensure you have enough storage for your shots.
Camera Settings for Night Photography
Understanding and mastering your camera settings is crucial for successful night photography. Here are the key settings you need to focus on:
ISO
ISO measures the sensitivity of your camera’s sensor to light. For night photography, you’ll often need to use a higher ISO setting (e.g., 800-3200). However, be mindful of noise, which increases with higher ISO levels.
Aperture
The aperture controls the amount of light that enters the camera. A wider aperture (e.g., f/1.8) allows more light in and is ideal for night photography. However, a narrower aperture (e.g., f/8) can be useful for capturing sharp details in the foreground and background.
Shutter Speed
Shutter speed determines how long the camera’s sensor is exposed to light. For night photography, you’ll often use long exposures (e.g., 10-30 seconds) to capture enough light. Longer exposures can create stunning light trails and star trails.
Focus
Autofocus can struggle in low-light conditions, so it’s often best to switch to manual focus. Use live view and zoom in on a bright object (e.g., a star or streetlight) to achieve sharp focus.
Techniques for Capturing Stunning Night Photos
Now that you have the right equipment and understand the essential camera settings, let’s dive into some techniques that will help you capture stunning night photos:
Light Trails
Light trails from moving cars can add a dynamic element to your night photos. To capture light trails, set your camera on a tripod, use a small aperture (e.g., f/8), and a long shutter speed (e.g., 15-30 seconds). Position yourself near a busy road or highway for the best results.
Star Trails
Star trails are created by the Earth’s rotation and can be captured using very long exposures. Use a tripod, set your camera to bulb mode, and use a remote shutter release to keep the shutter open for several minutes or even hours. A wide-angle lens and a dark location away from city lights are essential for star trail photography.
Milky Way
Photographing the Milky Way requires a dark sky location, usually far from city lights. Use a wide-angle lens with a fast aperture (e.g., f/2.8) and a high ISO setting (e.g., 3200). Set your shutter speed to around 20-30 seconds to avoid star trails and capture the Milky Way in all its glory.
Cityscapes
Cityscapes at night can be mesmerizing with their glowing lights and reflections. Use a tripod and a smaller aperture (e.g., f/8) for a deep depth of field. Experiment with different shutter speeds to capture light trails from cars and create a sense of motion.
Light Painting
Light painting involves using a light source (e.g., flashlight, LED) to “paint” a scene during a long exposure. Set your camera on a tripod, use a long shutter speed (e.g., 30 seconds), and move the light source around to create patterns and shapes. This technique can produce creative and surreal images.
Post-Processing Tips for Night Photography
Post-processing is an essential part of night photography, helping you enhance your images and correct any issues. Here are some tips for post-processing night photos:
Noise Reduction
High ISO settings and long exposures can introduce noise into your images. Use noise reduction tools in software like Adobe Lightroom or Photoshop to reduce noise without sacrificing too much detail.
Adjusting Exposure
Night photos can often appear too dark or too bright. Use the exposure adjustment tools in your editing software to fine-tune the exposure and bring out details in the shadows and highlights.
White Balance
Artificial lights can create color casts in your night photos. Adjust the white balance to correct these color casts and achieve a more natural look. You can use the temperature and tint sliders in Lightroom or Photoshop for precise adjustments.
Enhancing Colors
Night scenes often have rich and vibrant colors. Enhance these colors using the saturation and vibrance sliders in your editing software. Be careful not to overdo it, as this can result in unnatural-looking images.
Sharpening
Sharpening helps bring out details and make your images look crisper. Use the sharpening tools in your editing software to enhance the details in your night photos. Again, be cautious not to over-sharpen, as this can introduce artifacts.
Conclusion
Mastering night photography with an SLR digital camera can be a rewarding and fulfilling experience. By understanding the essential equipment, camera settings, and techniques, you can capture stunning night photos that showcase the beauty of the nocturnal world. Remember to practice and experiment with different settings and compositions to find what works best for you. With patience and persistence, you’ll be able to create captivating images that leave a lasting impression.
Now that you have the knowledge and tools, it’s time to head out into the night and start capturing those magical moments. Happy shooting!
To anybody wanting to take better photographs today: Click Here!